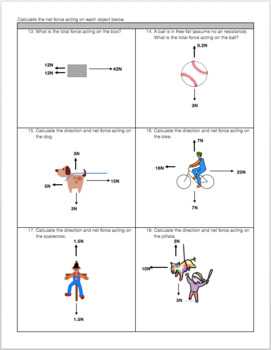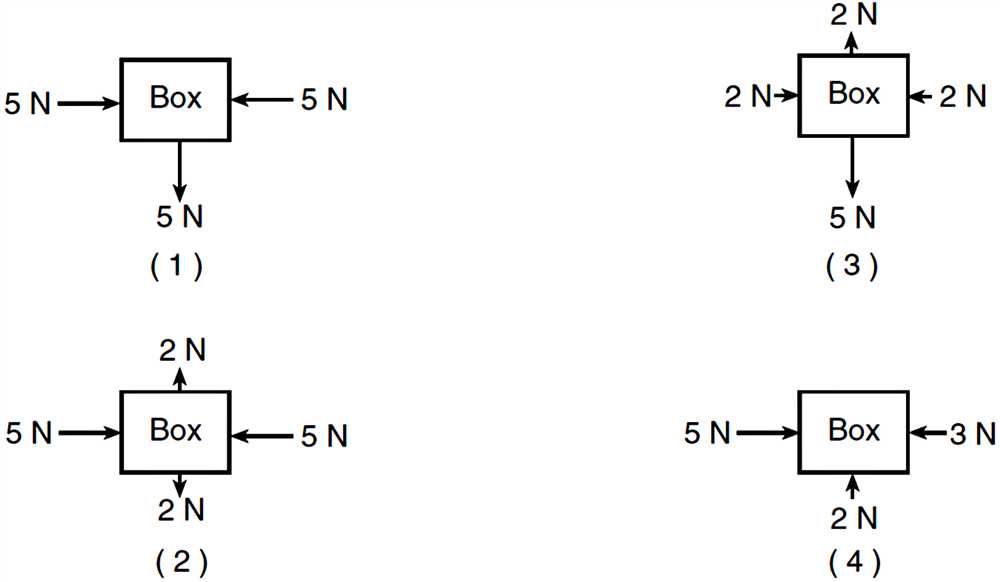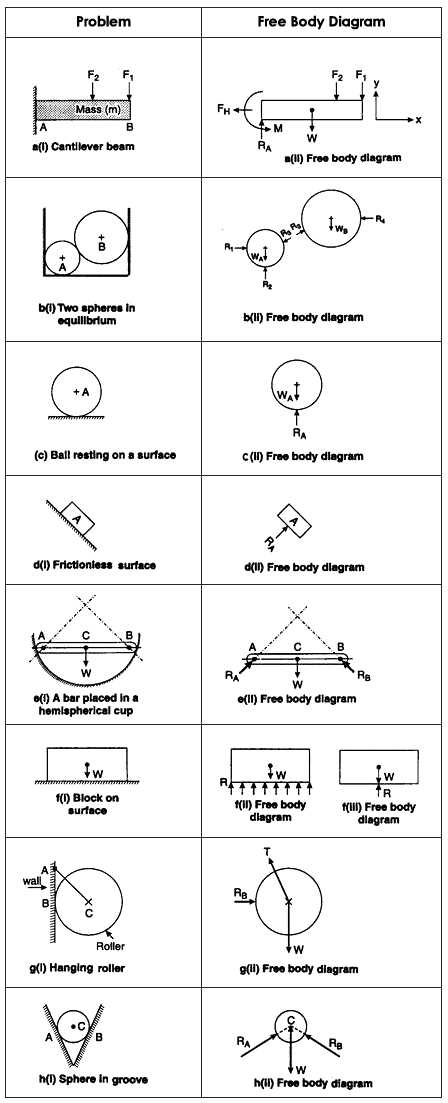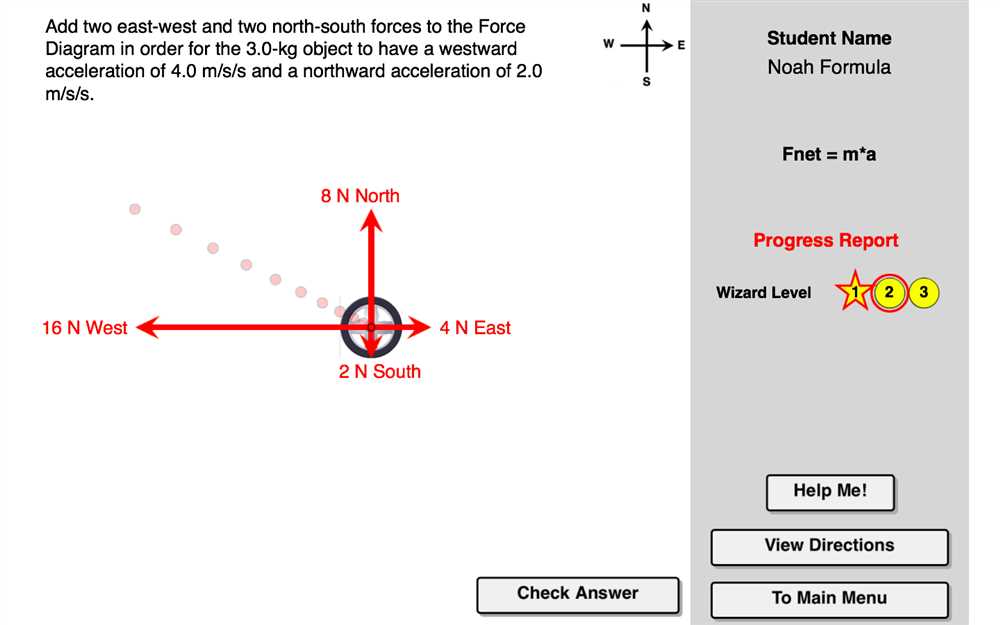
Free body diagrams are an essential tool in physics and engineering to represent the forces acting on an object in a given situation. They help us understand and analyze the motion and equilibrium of objects. When solving problems involving forces, it is crucial to have a clear understanding of free body diagrams.
In this article, we will provide answers to a worksheet on free body diagrams. The worksheet contains various scenarios, each describing a specific situation, and asks students to draw the corresponding free body diagram. By going through the answers, we will gain a better understanding of how to correctly represent the forces acting on objects.
Each answer will provide a step-by-step explanation of how to approach and solve the problem. We will identify the object of interest, list all the forces acting on it, and draw the forces as vectors originating from the object. The answers will also explain the significance of each force and how they contribute to the motion or equilibrium of the object.
Understanding Free Body Diagrams
A free body diagram is a visual representation used to analyze the forces acting on an object. It shows all the forces that are acting on the object as vectors, indicating their direction and magnitude. By understanding and correctly creating a free body diagram, we can effectively analyze and predict the motion of an object.
What is a free body diagram?
In physics, a free body diagram is a way to represent the forces acting on an object without considering its surroundings. It isolates the object of interest and shows all the forces acting on it, both external and internal. This diagram can help us understand how the object will move and accelerate based on the forces present.
How to create a free body diagram?
To create a free body diagram, you first need to identify the object you want to analyze. Then, you should consider all the forces acting on that object. These forces can include gravitational force, normal force, frictional force, applied force, tension, and so on. For each force, draw an arrow to represent its direction and label it with its magnitude.
Why are free body diagrams important?
Free body diagrams are crucial for analyzing the motion of objects in physics. They provide a simplified representation of the forces at play, allowing us to better understand the forces affecting the object’s motion. By analyzing and interpreting these diagrams, we can make predictions about the object’s acceleration, determine the net force acting on it, and solve complex physics problems.
Overall, understanding free body diagrams is fundamental in the study of mechanics and physics. They help us visualize and analyze the forces acting on an object, enabling us to make predictions and understand the fundamental principles of motion.
What are Free Body Diagrams?
A free body diagram is a visual representation used in physics to analyze the forces acting on an object. It is a simplified, labeled diagram that shows all the forces acting on an object as arrows, with the length and direction of each arrow corresponding to the magnitude and direction of the force.
In a free body diagram, the object of interest is usually represented by a dot or box, and all the forces acting on it are shown as arrows pointing away from the dot or box. The arrows are labeled with the names of the forces and sometimes include their magnitudes. The forces can include gravity, normal force, tension, friction, applied force, and any other force that may be acting on the object.
The purpose of drawing a free body diagram is to visually examine the forces acting on the object and analyze their effects. By isolating the object and considering all the forces acting on it, one can determine the net force acting on the object and how it will move or react in response to these forces. Free body diagrams are an important tool in understanding and solving physics problems, as they provide a clear and systematic approach to analyzing forces.
The Importance of Free Body Diagrams
Free body diagrams (FBDs) are a fundamental tool in the study of physics and engineering. They are visual representations of the forces acting on an object in a given situation. Understanding and correctly drawing FBDs is crucial for analyzing the forces at play in various scenarios and for solving problems involving equilibrium and motion.
In physics, FBDs are used to represent the forces acting on an object, often represented by a dot or a simple drawing, in a clear and organized manner. Each force is drawn as an arrow, with the arrow’s length representing the magnitude of the force and its direction indicating the direction in which the force is applied. By analyzing the FBD, one can determine the net force acting on the object and understand how it will affect the object’s motion.
- Clarity: FBDs provide a clear representation of the forces acting on an object, allowing for a better understanding of the forces involved and their effects.
- Analysis: By correctly drawing and analyzing an FBD, one can determine the net force acting on an object, which is essential for understanding equilibrium and predicting motion.
- Problem-solving: FBDs are an invaluable tool for solving physics problems. By breaking down a complex situation into its individual forces, one can easily identify and manipulate the relevant forces to solve equations and determine unknown quantities.
- Communication: FBDs provide a visual language for communicating the forces acting on an object. They allow engineers and scientists to clearly convey their ideas and analysis to others, facilitating collaboration and understanding.
In conclusion, free body diagrams are of utmost importance in physics and engineering. They provide a clear and organized representation of the forces acting on an object, allowing for analysis, problem-solving, and effective communication of ideas. Mastering the skill of drawing and interpreting FBDs is essential for success in the field of physics and engineering.
Steps to Create Free Body Diagrams

Free body diagrams are used to represent the forces acting on a particular object in a given situation. These diagrams help to visualize and analyze the various forces acting on the object, making it easier to solve problems related to equilibrium and motion. Here are the steps to create free body diagrams:
1. Identify the object of interest: Start by identifying the object or system for which you want to create a free body diagram. It could be a simple object like a block or a more complex system like a vehicle.
2. Isolate the object: In order to analyze the forces acting on the object, it is important to isolate it from its surroundings. Remove any other objects or components that are not directly connected to the object of interest.
3. Determine the forces: Next, identify all the forces acting on the object. These can include gravitational forces, contact forces, applied forces, frictional forces, and any other forces that are relevant to the specific situation.
4. Represent the forces: Once you have identified the forces, you need to represent them in the free body diagram. Draw arrows to represent each force, making sure to label them with the appropriate symbols or names.
5. Indicate the direction: It is important to indicate the direction of each force on the diagram. This can be done by adding arrows to the lines representing the forces. The arrows should point in the direction in which the force is acting.
6. Label the forces: In addition to representing the forces with arrows, make sure to label each force with its corresponding symbol or name. This will help to clearly identify and analyze the forces when solving problems.
7. Review and analyze: Once you have created the free body diagram, review it to ensure that all the forces have been correctly represented. Use the diagram to analyze the forces and determine the net force acting on the object.
8. Use the diagram to solve problems: Finally, use the free body diagram to solve problems related to equilibrium, motion, or any other relevant topics. The diagram provides a visual representation of the forces, making it easier to apply the principles of Newton’s laws and solve problems.
Step 1: Identify the Object
In order to create an accurate free body diagram, the first step is to identify the object for which the diagram is being created. It is important to have a clear understanding of the object and its physical properties before proceeding. This includes determining the shape, size, and material composition of the object. For example, if the object is a box, its dimensions and weight should be known.
Once the object has been identified, it is essential to define a reference point for the diagram. This reference point serves as a fixed point from which all forces acting on the object will be measured. It is typically placed at the center of mass of the object, but may vary depending on the specific situation. The reference point should be indicated clearly on the diagram.
Key phrases:
- Identify the object
- Physical properties
- Shape, size, and material composition
- Reference point
- Center of mass
By accurately identifying the object and establishing a reference point, the free body diagram can be created with precision. This diagram is an important tool in understanding the forces acting on an object and can be used to analyze its motion and stability. The diagram should clearly show all external forces acting on the object, such as gravity, friction, and applied forces. By properly labeling and representing these forces, a better understanding of the object’s behavior can be gained.
Step 2: Isolate the Object
Once you have identified all the forces acting on an object in a free body diagram, the next step is to isolate the object and eliminate any unnecessary forces. This step is crucial in simplifying the diagram and focusing on the forces that are directly affecting the object.
To isolate the object, you need to remove all external forces that are not in direct contact with the object or are not directly influencing its motion. This includes forces that act on other objects or are transmitted through strings, pulleys, or any other connecting mechanisms.
For example, if you are analyzing the forces acting on a box being pulled along the ground by a rope, you would only include the force of tension in the rope and the force of gravity acting on the box. You would ignore any forces acting on the rope or any other external forces that are not directly related to the motion of the box.
By isolating the object and focusing only on the relevant forces, you can simplify the free body diagram and make it easier to analyze and solve for unknown quantities such as acceleration or tension. This step helps to ensure that you are considering all the forces that are actually affecting the object and avoiding any unnecessary complications or errors in your analysis.
Step 3: Identify Forces Acting on the Object
Once you have identified the object or system that you are analyzing and have drawn the outline or shape of the object, the next step is to identify the forces that are acting on the object. This step is crucial in understanding the forces that are responsible for the motion or equilibrium of the object.
To identify the forces, carefully examine the object and consider all the external influences that might be acting on it. These forces can be broadly categorized into two types: contact forces and non-contact forces. Contact forces are those forces that result from direct physical contact between the object and another object or surface. These include forces like friction, normal force, tension, and applied force. Non-contact forces, on the other hand, are forces that act on the object without any physical contact. Examples include gravitational force, electromagnetic force, and magnetic force.
Once you have identified the different types of forces that are acting on the object, draw arrows on your free body diagram to represent each force. Label each arrow with the name of the force and indicate its direction. The arrow should point away from the object if the force is acting in that direction, and towards the object if the force is acting towards it. Include all the relevant forces that are acting on the object, regardless of their magnitude or direction.
Remember that when drawing the forces on your free body diagram, it is important to be accurate and keep the scale consistent. The length and direction of each arrow should be proportional to the magnitude and direction of the force. This will help you accurately analyze the forces and determine their influences on the motion of the object.
Example Free Body Diagrams

In physics, free body diagrams are used to visualize the forces acting on an object. These diagrams help us understand and analyze the motion and equilibrium of objects. Here are a few examples of free body diagrams:
Example 1: A Block on an Inclined Plane

Object: A block of mass m resting on an inclined plane.
Forces:
- The weight of the block, mg, acting vertically downwards.
- The normal force exerted by the inclined plane on the block, perpendicular to the plane.
- The force of friction acting parallel to the plane.
Free Body Diagram:
| mg | | |
| — | |
| friction | | |
| — | |
| normal force | | |
Example 2: A Ball in Free Fall
Object: A ball falling freely under the influence of gravity.
Forces:
- The weight of the ball, mg, acting vertically downwards.
Free Body Diagram:
| mg | | |
These examples illustrate how free body diagrams can provide a visual representation of the forces acting on an object. By analyzing these diagrams, we can better understand the forces involved and their effects on the object’s motion.