
When it comes to setting up a new computer or upgrading an existing one, installing a processor is a crucial step. The processor, also known as the central processing unit (CPU), is one of the most important components of a computer. It is responsible for executing instructions, performing calculations, and managing tasks.
In this lab, we will guide you through the process of installing a processor in testing mode. Testing mode allows you to ensure that the processor is functioning correctly before installing it permanently in your computer. This is particularly useful if you have just purchased a new processor or if you are unsure about the compatibility of the processor with your motherboard.
Before we begin, it’s essential to gather all the necessary tools and materials. You will need the processor itself, a compatible motherboard, a heat sink, thermal paste, a screwdriver, and an antistatic wrist strap. Ensure that you are working in a clean and well-lit environment to avoid any accidental damage.
In the following steps, we will walk you through the process of installing the processor in testing mode. It’s important to follow the instructions carefully to avoid any mishaps. Once you have successfully tested the processor, you can proceed with installing it in your computer and enjoy improved performance and speed.
Lab 3-6 Testing Mode Install a Processor
In the process of building or upgrading a computer, one essential step is the installation of a processor. A processor, also known as a central processing unit (CPU), is the brain of the computer and is responsible for executing instructions and performing calculations. To ensure that the processor is installed correctly and is functioning properly, it is important to perform testing in the testing mode.
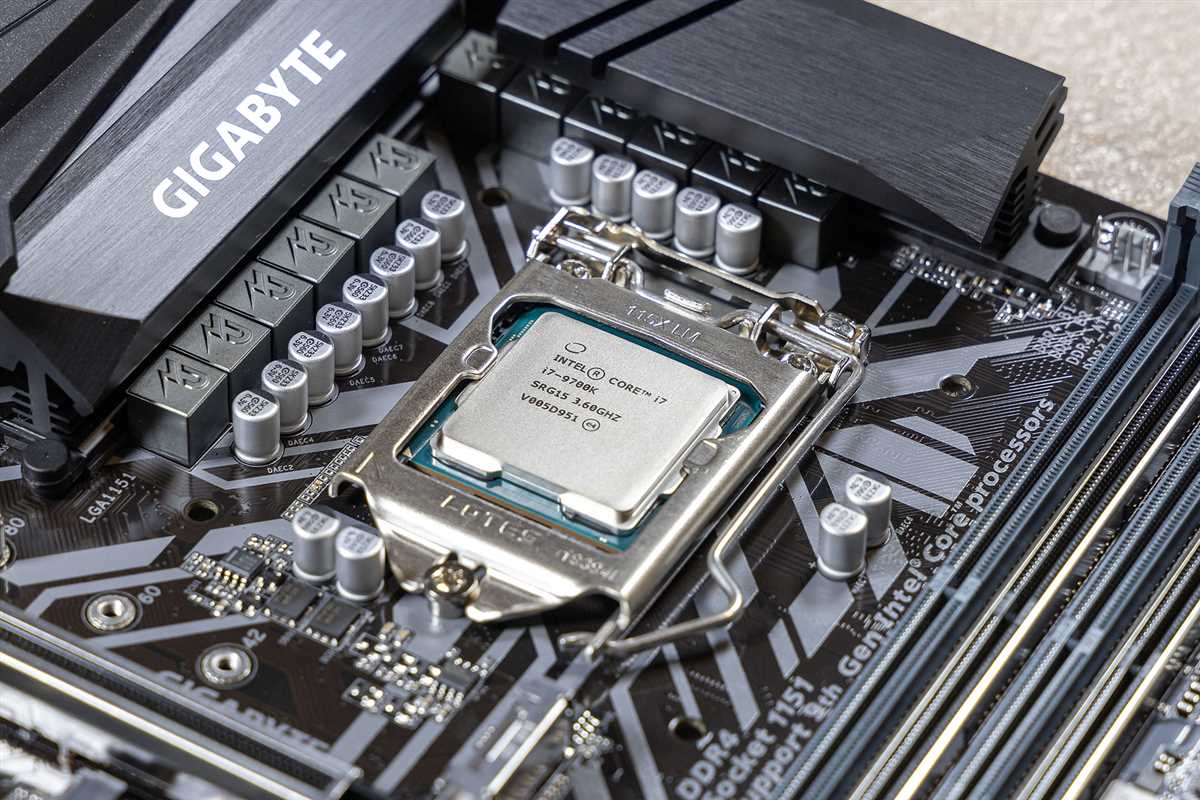
In the Lab 3-6 Testing Mode, the focus is on installing a processor and verifying its functionality. This involves carefully placing the processor in the appropriate socket on the motherboard, ensuring that it is correctly aligned and seated. Once the processor is installed, the next step is to power on the computer and access the testing mode.
The testing mode allows for the verification of various aspects of the processor’s functionality. This includes checking its clock speed, cache size, and instruction execution capabilities. Additionally, the testing mode can also help identify any potential issues such as overheating or compatibility problems. It is important to follow the prescribed testing procedures and guidelines provided in the Lab 3-6 instructions to ensure accurate results.
During the testing mode, it is recommended to closely monitor the temperature of the processor to prevent overheating. This can be done using specialized software or by monitoring the temperature readings in the computer’s BIOS. It is crucial to ensure that the processor remains within safe temperature limits to avoid any damage.
In conclusion, the Lab 3-6 Testing Mode for installing a processor is an important step in the computer building or upgrading process. By carefully following the instructions and performing the necessary tests, one can ensure the proper functionality of the processor and identify any potential issues. This ensures a stable and efficient computer system.
What is Lab 3-6 Testing Mode?
The Lab 3-6 Testing Mode refers to a specific testing procedure for the installation of a processor in a computer system. This mode is designed to allow technicians and users to assess the functionality and performance of the newly installed processor before fully integrating it into the system.
In Lab 3-6 Testing Mode, the computer system is configured to run various tests and benchmarks to evaluate the processor’s capabilities. These tests may include checking for compatibility with the existing hardware and software, measuring processing speed and efficiency, and stress testing the processor under heavy workloads.
The Lab 3-6 Testing Mode provides several benefits:
- Quality assurance: By running comprehensive tests in this mode, technicians can ensure that the newly installed processor is functioning correctly and meets the necessary performance standards.
- Identifying issues: If any issues or incompatibilities arise during the testing process, they can be identified and addressed before the processor is fully integrated into the system.
- Optimization: The testing mode allows for fine-tuning and optimization of the processor’s settings to achieve the best performance and efficiency.
- Performance evaluation: By running benchmarks and stress tests, the testing mode helps in determining the processor’s capabilities and comparing them with industry standards.
Overall, Lab 3-6 Testing Mode is a crucial step in the installation process of a processor as it ensures proper functioning, compatibility, and optimal performance of the system.
Preparation for Lab 3-6 Testing Mode
Before proceeding with Lab 3-6 Testing Mode installation, it is important to ensure that all necessary preparations are in place. This will help to avoid any potential issues and ensure a smooth installation process. The following steps outline the preparation required:
1. Gather the necessary tools and equipment
Make sure to gather all the necessary tools and equipment needed for the installation. This may include a screwdriver, thermal paste, an antistatic wrist strap, and any other tools specific to your motherboard or processor. Check the documentation of your specific hardware to ensure you have all the required tools.
2. Read the documentation
Read the documentation provided with your motherboard and processor to familiarize yourself with the installation process. Pay close attention to any specific instructions or precautions mentioned in the documentation. This will help you understand the steps involved and avoid any mistakes during the installation.
3. Prepare the work area
Clean and prepare the work area where you will be performing the installation. Make sure to have a clean and static-free surface to work on. Use an antistatic mat or an antistatic wrist strap to protect the hardware from any potential damage caused by static electricity. Keep all the components and tools organized and within reach to ensure a smooth installation process.
4. Backup and secure data
Before proceeding with any hardware installation, it is always a good practice to backup your important data. In case anything goes wrong during the installation process, you will have a backup of your data to rely on. Make sure to securely store your backup data in a separate location to avoid any potential loss or damage.
5. Power off and disconnect the system
Prior to opening your computer case and installing the processor, make sure to power off the system and disconnect it from the power source. This will ensure your safety and prevent any potential damage to the hardware. Also, disconnect any peripheral devices such as monitors, keyboards, and mice.
By following these preparation steps, you will be ready to start the Lab 3-6 Testing Mode installation process with confidence. Remember to take your time and double-check all the connections and steps to ensure a successful installation. Good luck!
Tools and Materials for Installing a Processor
Before installing a processor in your computer, it is important to gather all the necessary tools and materials to ensure a successful installation. Having the right equipment will not only make the process easier, but also prevent any potential damage to the processor or motherboard.
Tools:
- Screwdriver: You will need a small Phillips head screwdriver to remove and secure any screws holding the CPU cooler or socket cover.
- Thermal paste applicator: Thermal paste is used to improve heat transfer between the processor and heatsink. An applicator tool can help evenly spread the paste over the CPU surface.
- Tweezers: A pair of tweezers can be useful for handling delicate components, such as the processor or tiny jumper cables.
Materials:
- Processor: Obviously, you will need the processor itself. Make sure it is compatible with your motherboard and that you have the correct socket type.
- Heatsink and fan: The processor must be properly cooled to prevent overheating. A heatsink and fan combination is typically used for this purpose.
- Thermal paste: As mentioned earlier, thermal paste helps with heat transfer. Make sure you have a high-quality paste that is suitable for your processor.
Having all these tools and materials ready before starting the installation process will save you time and effort. It is also important to follow the manufacturer’s instructions and guidelines to ensure a proper installation, as each processor and motherboard may have different requirements.
Step-by-Step Guide to Install a Processor
Installing a processor is an important step in building or upgrading a computer system. A processor, also known as the central processing unit (CPU), is responsible for executing instructions and performing calculations in a computer. Follow these steps to ensure a successful installation of a processor.
Step 1: Preparing for Installation
Before you begin the installation process, it is important to gather all the necessary tools and components. You will need a compatible processor, a motherboard that supports the processor socket type, thermal paste, a screwdriver, and an antistatic wrist strap. Make sure to work in a clean and static-free environment to avoid damaging any components.
Step 2: Removing the Old Processor (if applicable)
If you are upgrading an existing system, you will need to remove the old processor first. Start by turning off the computer and unplugging it from the power source. Open the computer case and locate the existing processor. Carefully release the CPU socket latch and gently lift the old processor out of the socket. Place it in a safe location or dispose of it properly, depending on your local regulations.
Step 3: Applying Thermal Paste
Before installing the new processor, it is important to apply a thin layer of thermal paste on the top of the CPU. Thermal paste helps to improve heat transfer between the CPU and the heatsink. Apply a small amount of thermal paste on the center of the processor, making sure to spread it evenly using a clean and lint-free cloth or a plastic card.
Step 4: Installing the Processor
Align the notches or markings on the processor with the socket on the motherboard. Carefully place the processor into the socket, ensuring it is properly seated and making sure not to apply excessive force. Once the processor is in place, gently close the CPU socket latch to secure it.
Step 5: Securing the Heatsink
After installing the processor, you will need to install the heatsink to help dissipate heat. Apply even pressure and attach the heatsink to the designated mounting points on the motherboard. Use a screwdriver to secure the heatsink in place, following the manufacturer’s instructions. Make sure the heatsink is securely attached and does not wobble.
Step 6: Finalizing the Installation
Once the processor and heatsink are installed, double-check all connections and ensure that everything is properly aligned. Close the computer case and reconnect all cables and peripherals. Plug in the power source and turn on the computer. If everything is done correctly, the computer should boot up without any issues. Monitor your system for any unusual temperatures or performance problems, and make any necessary adjustments.
Following this step-by-step guide to install a processor will help you successfully complete the installation process and ensure the smooth operation of your computer system. Remember to take your time and handle all components with care to avoid any damage.
Testing the Installed Processor in Lab 3-6
After successfully installing a processor in Lab 3-6, it is important to test its functionality to ensure it is working properly. This is a crucial step in the process of setting up a computer system, as any issues with the processor can cause performance problems and instability in the system.
The first step in testing the installed processor is to power on the computer. Ensure that all the necessary cables are connected and the power supply is functioning correctly. Once the system is powered on, the BIOS will perform a series of tests, including checking the processor for any errors or faults.
Next, it is recommended to run a stress test on the processor to evaluate its performance under heavy load. This can be done using various benchmarking software, such as Prime95 or AIDA64. These programs will put the processor through intensive tasks to check for any overheating or stability issues. It is important to monitor the temperatures during the stress test to ensure they are within safe limits.
Another important aspect of testing the installed processor is verifying its compatibility with the motherboard and other components. This can be done by checking the BIOS version and updating it if necessary. The motherboard manufacturer’s website will provide information on compatible processors and any required updates.
Additionally, it is recommended to check the system’s performance after testing the processor to ensure it is running smoothly. This can involve running various applications and tasks to gauge the overall responsiveness and speed of the system. If any issues are detected, further troubleshooting may be required.
In conclusion, testing the installed processor is an essential step in setting up a computer system. It helps ensure the processor is working properly, compatible with other components, and capable of handling the system’s workload. By following the recommended steps and using appropriate software, users can identify any issues and ensure optimal performance of their computer system.
Troubleshooting and Tips for Successful Installation
Installing a processor can sometimes be a complex process, requiring careful attention to detail. If you encounter any issues during the installation process, you may need to troubleshoot the problem in order to successfully install the processor. Here are some troubleshooting tips that can help you overcome common challenges:
- Check compatibility: Before installing a processor, make sure it is compatible with the motherboard and other components of your system. Verify that the processor socket and motherboard chipset are compatible with each other.
- Check for bent pins: Inspect the processor socket for any bent or damaged pins. Even a single bent pin can prevent the processor from seating properly. If you find any bent pins, use a small, non-conductive tool to carefully straighten them.
- Apply thermal paste correctly: Thermal paste helps to conduct heat away from the processor. It is important to apply the thermal paste correctly to ensure optimal heat transfer. Follow the manufacturer’s instructions or consult online resources for guidance on applying thermal paste.
- Double-check connections: Ensure that all connections, such as power cables and data cables, are securely and properly connected. Loose connections can cause the system to not power on or experience other issues.
- Clear CMOS: If you encounter problems after installing a new processor, you may need to clear the CMOS (Complementary Metal-Oxide-Semiconductor) memory. This can help resolve compatibility issues or conflicts with the previous processor settings. Refer to your motherboard manual for instructions on how to clear the CMOS.
Remember, the installation process requires patience and attention to detail. Take your time and double-check each step to ensure a successful installation. If you are unsure about any aspect of the installation process, consult the manufacturer’s documentation or seek assistance from a professional.