Understanding the Pythagorean theorem is a fundamental concept in mathematics. It explains the relationship between the sides of a right triangle and is widely used in various mathematical and real-world applications. One creative way to explore and demonstrate the Pythagorean theorem is through a spiral project.
A Pythagorean theorem spiral project is a visual representation of the theorem. It involves drawing multiple right triangles with different side lengths and arranging them in a spiral pattern. The lengths of the sides of the triangles are chosen to satisfy the Pythagorean theorem: a² + b² = c².
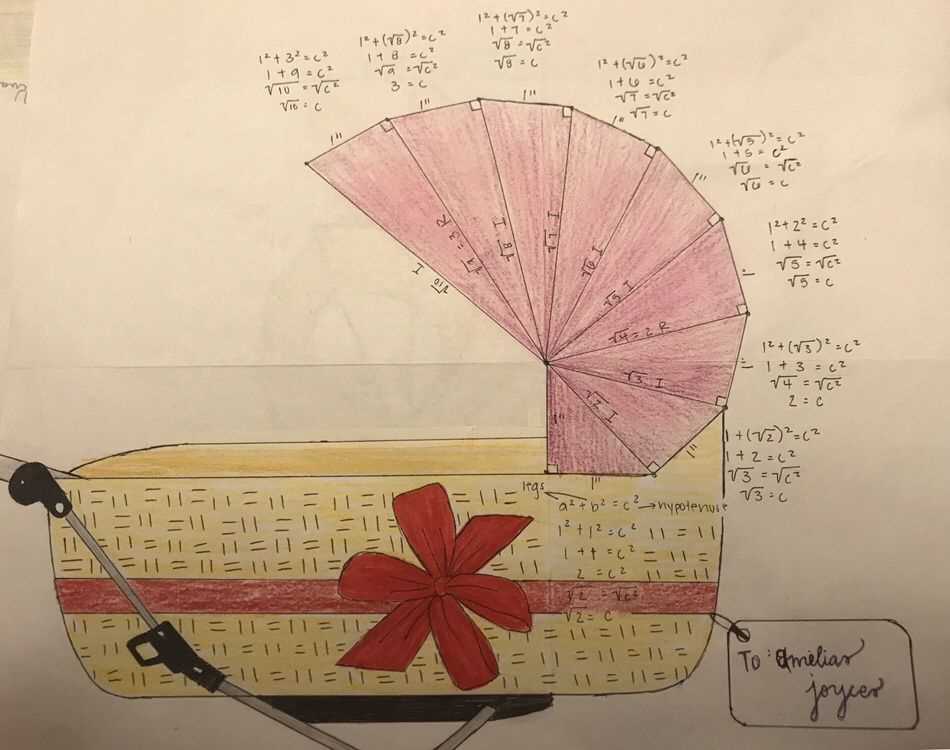
By completing a Pythagorean theorem spiral project, students can apply their knowledge of the theorem and explore the patterns and relationships that emerge. It allows them to visually see how the squares of the two shorter sides of a right triangle add up to the square of the longest side. This hands-on project helps students deepen their understanding of the Pythagorean theorem and its practical applications.
What is the Pythagorean theorem spiral project?
The Pythagorean theorem spiral project is a mathematical activity that helps students visualize the Pythagorean theorem and understand its applications in real-life situations. The project involves creating a spiral using right triangles with side lengths that follow the Pythagorean theorem formula. This formula states that in a right triangle, the square of the length of the hypotenuse (the side opposite the right angle) is equal to the sum of the squares of the other two sides.
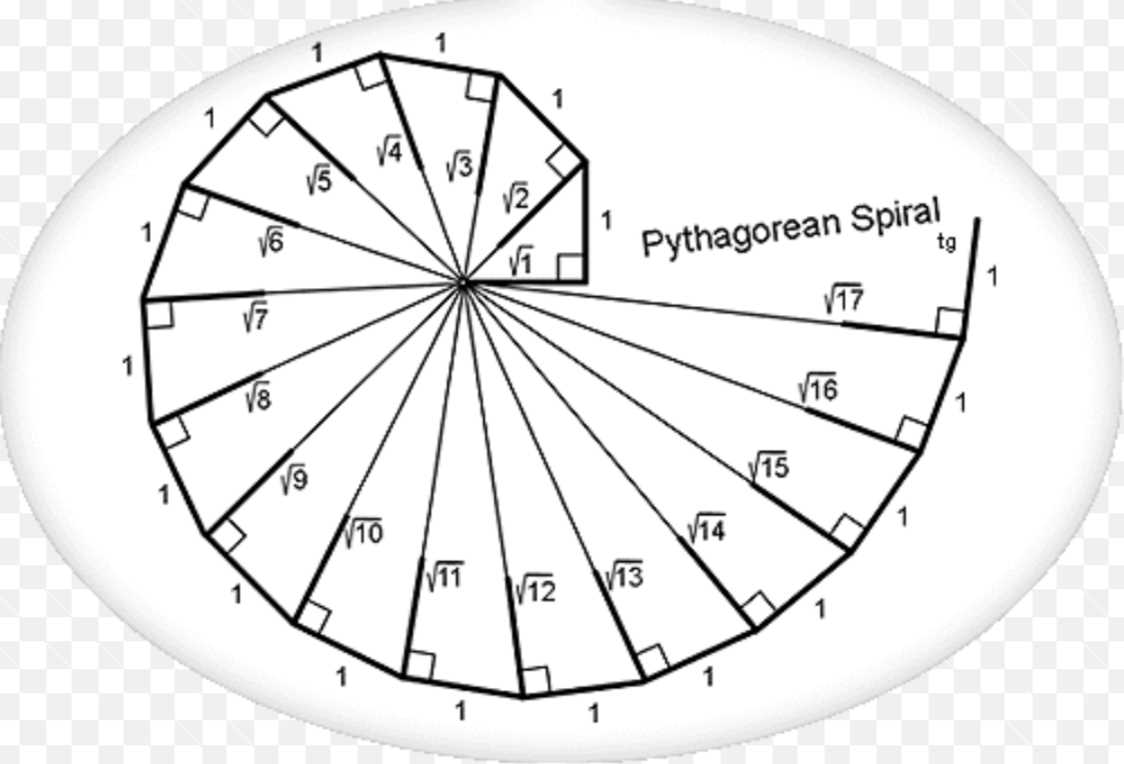
To create the spiral, students start with a right triangle and use the Pythagorean theorem to calculate the length of the hypotenuse. They then construct a new right triangle adjacent to the previous one, with one side being the hypotenuse of the previous triangle. By repeating this process and connecting the vertices of the triangles, a spiral shape is formed. Each new triangle added to the spiral represents a larger right triangle with longer side lengths and an increasingly larger hypotenuse.
This project helps students see the relationship between the side lengths of right triangles and reinforces their understanding of the Pythagorean theorem. It also allows them to explore patterns and find connections between mathematical concepts. Students can experiment with different starting triangles, scales, and spiral designs to create unique patterns and shapes. This hands-on activity encourages creativity, critical thinking, and problem-solving skills while engaging students in a fun and interactive way to learn about the Pythagorean theorem.
Understanding the basics of the Pythagorean theorem

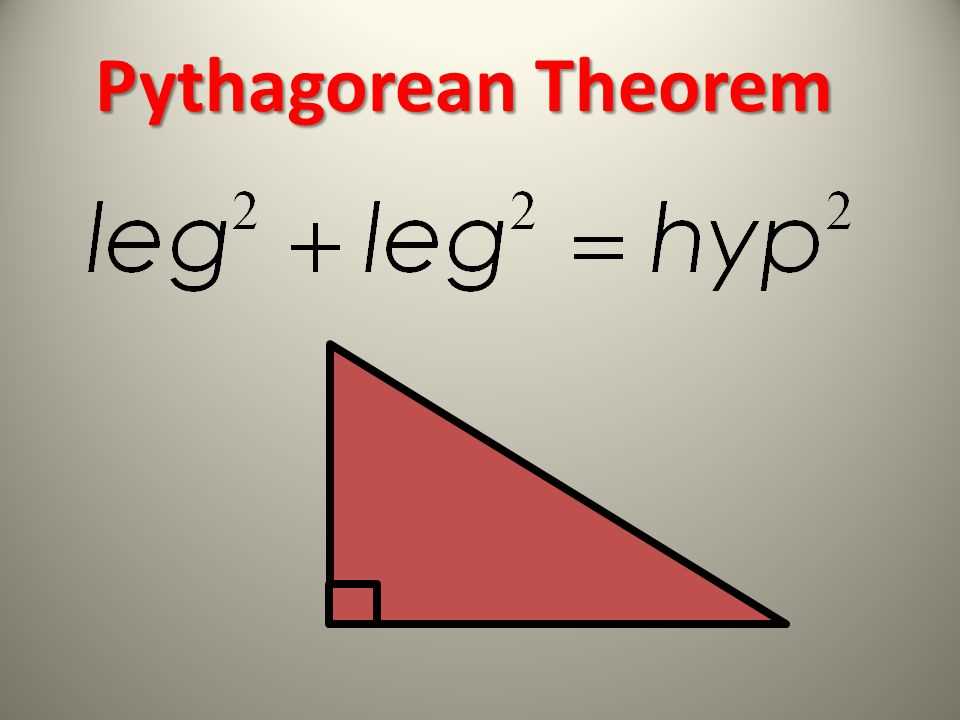
The Pythagorean theorem is a fundamental concept in geometry that relates the sides of a right triangle. It states that the square of the hypotenuse (the side opposite the right angle) is equal to the sum of the squares of the other two sides. The theorem is represented by the equation: a^2 + b^2 = c^2, where “a” and “b” are the lengths of the two legs of the right triangle, and “c” is the length of the hypotenuse.
By understanding the Pythagorean theorem, we can solve various problems involving right triangles, such as finding the length of a missing side or determining if a triangle is a right triangle. This theorem is particularly useful in practical applications, such as construction, architecture, and engineering, where accurate measurements and calculations are essential.
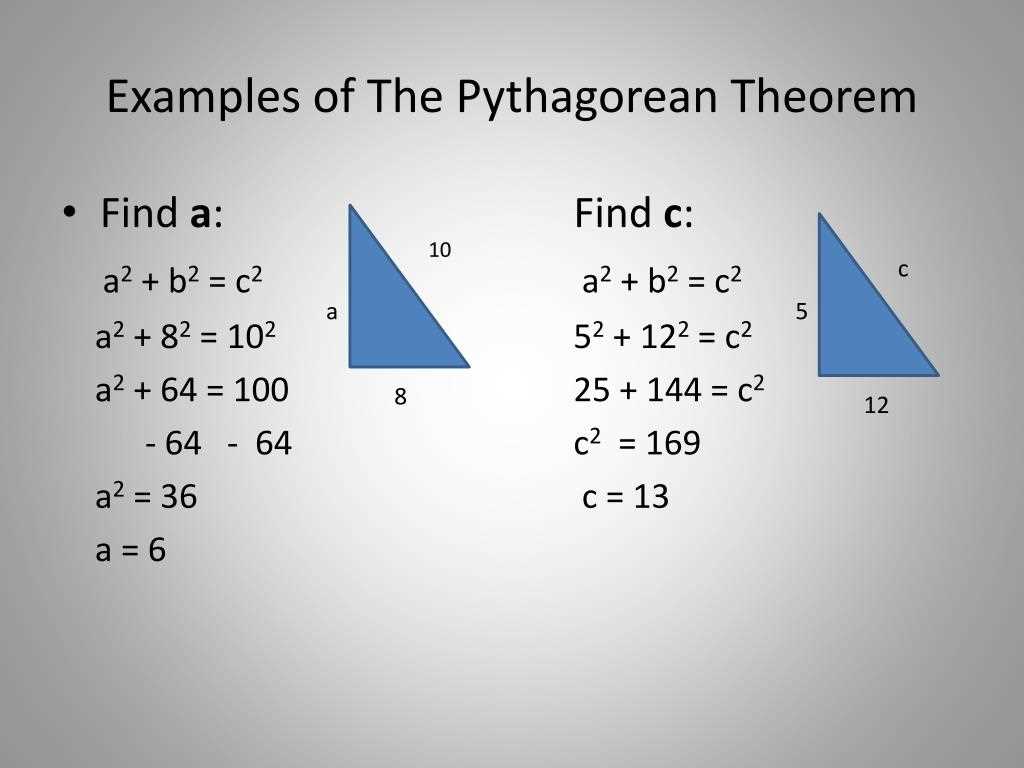
To apply the Pythagorean theorem, we first identify the right triangle and label the lengths of its sides. Using the equation a^2 + b^2 = c^2, we can substitute the given values and solve for the unknown length. It is important to note that the Pythagorean theorem only applies to right triangles, and cannot be used for triangles that do not have a right angle.
The Pythagorean theorem has a rich history and is named after the ancient Greek mathematician, Pythagoras, who is credited with its discovery. However, the concept of the theorem predates Pythagoras, as evidence of its use has been found in ancient Egyptian and Babylonian civilizations. Today, the Pythagorean theorem remains a fundamental tool in geometry and is taught to students around the world.
To further illustrate the Pythagorean theorem, let’s consider an example. In a right triangle with one leg measuring 3 units and the hypotenuse measuring 5 units, we can use the theorem to find the length of the other leg. By substituting the values into the equation a^2 + b^2 = c^2, we have 3^2 + b^2 = 5^2. Solving for “b,” we get b = 4 units. Therefore, the length of the missing leg is 4 units.
Exploring the concept of the Pythagorean theorem spiral
The Pythagorean theorem is a fundamental concept in geometry that relates the lengths of the sides of a right triangle. It states that the square of the length of the hypotenuse is equal to the sum of the squares of the other two sides. This theorem has numerous applications and can be used to solve various real-world problems.
One interesting application of the Pythagorean theorem is the concept of the Pythagorean spiral. The Pythagorean spiral is a logarithmic spiral that is constructed using the Pythagorean theorem. Starting with a right triangle with sides of length 1, the hypotenuse is extended to form a new right triangle. This process is repeated, and each time, a new right triangle is formed with sides that are one unit longer than the previous triangle.
This construction results in a spiral shape that continues infinitely. The relationship between the lengths of the sides of each triangle and the spiral shape is fascinating. As the length of the sides of the triangles increases, the spiral becomes more tightly wound. This means that the distance between each complete turn of the spiral decreases as the spiral grows.
The Pythagorean theorem spiral is found in nature, such as in the shape of hurricanes and galaxies, as well as in man-made designs, such as spiral staircases and the spiral structure of DNA. Its appearance in these diverse contexts highlights the universality and importance of the Pythagorean theorem in understanding the world around us.
- The Pythagorean theorem is a fundamental concept in geometry.
- It relates the lengths of the sides of a right triangle.
- The Pythagorean spiral is a logarithmic spiral constructed using the Pythagorean theorem.
- As the length of the sides of the triangles in the spiral increases, the spiral becomes more tightly wound.
- The Pythagorean theorem spiral is found in nature and man-made designs.
Step-by-step guide to creating a Pythagorean theorem spiral project
Creating a Pythagorean theorem spiral project is a fun way to explore the relationship between the sides of a right-angled triangle. In this step-by-step guide, you will learn how to create your own Pythagorean theorem spiral project.
Materials:
- Graph paper
- Ruler
- Pencil
- Compass
Step 1: Draw a large right-angled triangle on your graph paper. Label the vertical side as ‘a’, the horizontal side as ‘b’, and the hypotenuse as ‘c’.
Step 2: Calculate the length of the hypotenuse, ‘c’, using the Pythagorean theorem formula: c^2 = a^2 + b^2. Choose arbitrary values for ‘a’ and ‘b’ to solve for ‘c’.
Step 3: Using your ruler, draw a line segment with a length equal to ‘c’ from one of the vertices of the right-angled triangle. This will be the first side of your spiral.
Step 4: Next, use your compass to draw a circle with a radius equal to the length of side ‘c’ starting from the endpoint of the line segment you just drew. This will be the second side of your spiral.
Step 5: From the new intersection point of the second side of the spiral and the right-angled triangle, draw a line segment with a length equal to ‘b’ from the right angle. This will be the third side of your spiral.
Step 6: Repeat steps 4 and 5, alternating between drawing a circle and a line segment, until you reach the length of side ‘a’. This will create a spiral pattern.
Step 7: Label each line segment with its corresponding length using the values of ‘a’, ‘b’, and ‘c’ determined in step 2.
Step 8: Add any additional decorations or details to your spiral project to make it visually appealing.
Step 9: Finally, double-check your measurements and erase any unnecessary construction lines. Your Pythagorean theorem spiral project is now complete!
Common challenges and solutions in Pythagorean theorem spiral projects

When working on Pythagorean theorem spiral projects, students often encounter various challenges that can hinder their understanding and progress. However, with the right approach and mindset, these challenges can be overcome. Here are some of the common challenges and their solutions:
1. Identifying the hypotenuse and the legs:
One of the key components of the Pythagorean theorem is correctly identifying the hypotenuse and the legs of a right triangle. This can be challenging for students, especially when they are presented with complex shapes or diagrams. To address this issue, it is essential to emphasize the importance of understanding the structure of right triangles and the relationship between their sides. By practicing with different examples and providing visual aids, students can develop a solid understanding of the concept.
2. Applying the formula correctly:
Another common challenge in Pythagorean theorem spiral projects is applying the formula (a^2 + b^2 = c^2) correctly. Students may struggle with using the correct values for each side and correctly solving for the unknown side. To overcome this challenge, it is crucial to guide students through step-by-step examples and provide ample practice opportunities. Implementing real-life scenarios can also help students connect the theorem to practical situations, making it easier for them to apply the formula accurately.
3. Visualizing and interpreting the results:
Understanding the implications and significance of the Pythagorean theorem results can also be challenging for students. They may struggle to visualize and interpret the relationship between the sides of a right triangle. To address this challenge, incorporating hands-on activities, such as building models or using interactive apps, can help students visualize the theorem in action. Additionally, providing real-world examples, such as calculating the distance between two points on a map or determining the length of a diagonal in a rectangular room, can make the results more meaningful and relatable for students.
In conclusion, Pythagorean theorem spiral projects come with their fair share of challenges. However, by focusing on understanding the structure of right triangles, practicing the formula, and visualizing the results, students can overcome these challenges and develop a solid grasp of the Pythagorean theorem concept.
Examples of Pythagorean theorem spiral projects and their answers

The Pythagorean theorem is a fundamental concept in geometry that relates the sides of a right triangle. To help students understand and apply this theorem, teachers often assign spiral projects. These projects involve creating a visual representation of the Pythagorean theorem using various shapes and sizes.
Here are a few examples of Pythagorean theorem spiral projects and their corresponding answers:
-
Example 1:
For this project, students are given a right triangle with side lengths of 3 units and 4 units. They are asked to determine the length of the hypotenuse using the Pythagorean theorem. By substituting the given values into the theorem (a² + b² = c²), they can solve for the unknown side. In this case, the hypotenuse is calculated to be 5 units.
-
Example 2:
In this project, students are provided with a rectangle and asked to find the length of the diagonal using the Pythagorean theorem. They are given the measurements of the two sides of the rectangle (6 units and 8 units) and are required to calculate the diagonal. By applying the theorem, they find that the diagonal measures 10 units.
-
Example 3:
For this project, students are given a square with side length 5 units. They are instructed to find the diagonal of the square using the Pythagorean theorem. By substituting the side length into the theorem (a² + b² = c²), they can solve for the diagonal. In this case, the diagonal is determined to be 7.071 units (rounded to three decimal places).
These examples demonstrate how students can apply the Pythagorean theorem to solve real-world problems and visualize geometric relationships. Through these spiral projects, students develop a deeper understanding of the theorem and its applications.
Q&A:
Can you provide an example of a Pythagorean theorem spiral project?
Yes, a simple example of a Pythagorean theorem spiral project is to create a spiral where each curve represents a right triangle with sides of increasing lengths. The length of each curve can be calculated using the Pythagorean theorem.
How can I calculate the length of each curve in a Pythagorean theorem spiral project?
To calculate the length of each curve in a Pythagorean theorem spiral project, you can use the Pythagorean theorem. For example, if one side of the triangle is 3 units and the other side is 4 units, you can calculate the length of the hypotenuse (the curve) using the formula c^2 = a^2 + b^2, where c is the length of the hypotenuse and a and b are the lengths of the other two sides.
What are some variations of Pythagorean theorem spiral projects?
Some variations of Pythagorean theorem spiral projects include creating spirals using different shapes, such as squares or rectangles, instead of triangles. Another variation is to create spiral patterns using different multiples of the Pythagorean triple (3, 4, 5), such as (6, 8, 10) or (9, 12, 15).
How can I use a Pythagorean theorem spiral project in a math lesson?
A Pythagorean theorem spiral project can be used in a math lesson to help students understand and visualize the Pythagorean theorem. Students can create their own spiral patterns, calculate the lengths of the curves using the theorem, and explore the relationship between the lengths of the sides of the triangles.
What are some real-world applications of the Pythagorean theorem spiral projects?
Some real-world applications of Pythagorean theorem spiral projects include architecture, engineering, and design. The Pythagorean theorem is used to calculate distances, dimensions, and angles in various structures and objects. Spiral patterns can be found in nature, art, and various scientific fields as well.
What is a Pythagorean theorem spiral project?
A Pythagorean theorem spiral project is a mathematical project that involves creating a spiral using squares whose side lengths correspond to the Pythagorean theorem.
Can you give an example of a Pythagorean theorem spiral project?
Sure! One example of a Pythagorean theorem spiral project is to start with a square whose sides have lengths 3 units. Then, at one of the corners of the square, create another square with sides of length 4 units. Connect the opposite corners of these squares to form a right triangle. Repeat this pattern by creating squares with side lengths of 5 units, 6 units, and so on. As you continue this process, you will create a spiral shape.